
So you want to scrapbook. I hear you! I can’t imagine a better way to spend my free time. Being an instructor at my local scrapbook store I have come to realize that I have a lot of information to share. I have talked to people who are just getting started but are overwhelmed and don’t know what to buy or do first. Before I get into my wealth of information I want to share, I thought I might offer a little of my own scrapbooking experience.
I started scrapbooking in the year 2000. The year will always be a clear date for me as I took my first “out of North America” trip which was to Mazatlan, Mexico. I went with a large group and we went for New Year’s Eve 1999-2000 and being 22 and carefree I had none of the doomsday concerns that some others were experiencing! Happily, the trip was fabulous and when I returned I had a huge stash of photos and wanted to display them in a way that was more interesting than just an album. I mentioned this to my mother who took me to a local scrapbook store… and this is where the journey began.
Now I don’t want to tell you about every single scrapbooking experience I have had over the last 11 years – Instead I want to share with you what I have learned so that you do not have to go through the same ups and downs I have. Although I love this hobby and am so passionate about it, I will admit that I have wasted some time, energy, and money on things that could have been better done the first time around. So – let’s get started!
Today I am going to start with some terms but stayed tuned as I continue to add more basic information on Tools, Techniques, Design Tips, Buying tips and more!! These pages will be static and always be available for new scrappers to reference.
Here are some basic terms:
Cardstock: Cardstock is a heavy weight paper that (most commonly) comes in 2 sizes – 8 ½” x 11” (standard printer paper size) or 12” x 12”. This paper comes in a plethora of colors and textures. One of my favourite cardstock companies is Bazzill:

Patterned Paper: There are oodles of companies out there that design and sell patterned paper. For the most part, it is sold at a size of 12” x 12”. Occasionally some companies will also release patterned paper in other sizes like 6” x 6” to use for mini albums or other small projects but the standard is definitely 12” x 12”. Patterned paper tends to now come double sided. This means that it will have a design or image on both sides. AS with anything there are exceptions, but for the most part you will see double sided paper instead of single sided. Here is an example of a few patterned papers in the Bo Bunny Flowerchild line:

Embellishment: This term is very broad and it covers anything that you would add to your layout to enhance the appearance. Embellishments can be stickers, ribbon, made from paper, metal accents like brads or eyelets, rhinestones, paper or ribbon flowers, etc). Here is an example of the Bo Bunny Flowerchild Embellishments:

Layout: This is a term used to describe your overall creation. Most commonly layouts are either single page (12” x 12”) or double page (12” x 24”).
Adhesive: The product you will use to adhere your papers, photos and embellishments together. This will be discussed in greater detail under tools as there are many kinds of adhesive and different adhesives for different types of embellishments.
OK! So let's get going!!
Here is a picture of the scrapbooking layout we are going to complete. It is a basic layout with just a few techniques. Although it is a simple layout, it does have the key components of a scrapbooking layout. Paper (in this case cardstock and patterned paper), a title, photos, journaling and a few embellishments.


 Painted chipboard:

 At this point I used cardstock to cut some photo mats for photos. Photo mats are not always required but sometimes they help the photos stand out a little. I then laid out all the components I had... I still havent attached anything, just making sure I like the placement of items.
 I knew that I would definitely need a place to journal and tell a little story about the pictures so I used my circle punch to punch out some coordinating lined paper that I could journal on.
 And to make it stand out I used more of the blue cardstock I had already used behind the photos to make a mat for the journaling circle. I didnt have a punch so I just used something around the house that was circular and a little bigger than my green circle.
 Then I journaled (in case you couldnt tell!)...
 After I decided that I wanted to cut up the paper strip with words to use as an embellishment with the sticker.
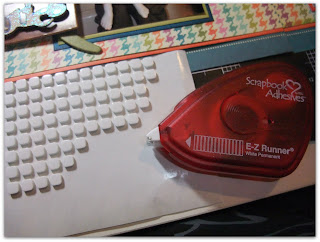
 Once all of of the details were laid out I started adhering everything. For details on different types of adhesive and what to use when, check out the Tools section of this blog. Here I used 3D dimensional squares (which I just call pop dots) and double sided adhesive.

OK! So let's get going!!
Here is a picture of the scrapbooking layout we are going to complete. It is a basic layout with just a few techniques. Although it is a simple layout, it does have the key components of a scrapbooking layout. Paper (in this case cardstock and patterned paper), a title, photos, journaling and a few embellishments.

I would like to point out that your layouts do not have to have all of these components if you don't want. Scrapbooking is a personal hobby and you should scrapbook however YOU want!
So how to get here? Well first you want to decide what paper you are going to use as your "base". It will be the bottom 2 pieces of paper that you will build your layout on. You can see that I have used a line of paper by We R Memory Keepers called Vintage Blue. It is a fun line with great colors.

Next I choose a paper that would stand out nicely and cut it in half. I used this to add some interest to the background.

Now I place my photos where I think they might look good. This is not the permanent home for these photos, I am just laying out these items to get a feel for how the layout will look and flow before I start attaching anything.

From another patterned paper, I decided to cut out some of the paper to use as an embellishment. I felt that the strip that said "your're my favorite" had the most potential. At this point I didn't know exactly where it was going to go - just that it would be a nice element on the page.

Next I cut a large strip of a different pattern to use on the background. This piece was 7" x 12" and I laid it across both sheets. I was sure to choose a pattern that wasn't too similar to the 2 patterns that I had already used so that they would stand out from one another.

Because this paper is double sided we are lucky to have double the selection of patterns! Because the back of the large dots is mostly a solid orange I cut 4 strips to use as an accent on the background. These orange strips were cut with the idea of making our large strip across the page stand out.


Sometimes I find that patterned papers really lend themselves to being cut up and used for embellishments. These papers did not fall into this category though! Although they are great there was no specific items I wanted to cut up and use as embellishments so I chose a package of embellishments I had in my stash.

The next task was to think about a title. I decided to use chipboard letters to make a large title that stands out. The ones shown here are from Stampin' Up! and the others I used were in a container of left overs so I am not sure who makes them anymore.

When you use chipboard you will often want to add some colour to the chipboard instead of using it just as a plain grey or brown as it comes. I decided to use paint for some words and Tim Holtz Distress Stain and Distress Stickles for the others. For more details how I used these items watch for a "Basic Technique" tutorial on how to color and add effects to chipboard.


At this point I figured that this will be the basic placing for the layout... As you will see this will change a little!


I then used ink to ink the edges. This will also be a "basic technique" tutorial that I will be adding very shortly.


Now that everything is attached we had our completed layout!! This simple layout shows the fundamentals of a basic scrapbook layout: title, journaling, photos and embellishments. I hope this helps you get inspired to jump in and complete your own layouts!
